On this page
All guides
Pick a preset
- Step 1:
Click Change layout (the grid icon) in the toolbar.
- Step 2:
Pick 1, 1×2, 2×2 or 1+3. Your streams move into those slots.
Use a saved template
- Step 1:
Open Change layout → Saved Templates.
- Step 2:
Pick a template. Every tile moves into its slot, and the desk stays in that template: a new stream takes the next empty slot.
- Step 3:
Choose None to leave the template.
While a template is on, dropping a tile on another swaps them, and dropping it on an empty slot moves it there. Nothing else is pushed aside.
Open the Template Editor
- Step 1:
Open the ☰ Account menu at the right of the toolbar.
- Step 2:
Choose Template Editor. It opens over the stage on a blank canvas; nothing is saved until you save.
- Step 3:
Press Esc or Close to leave it.
Basic editor (simple controls)
With Show all controls off you get the basic editor: the same templates with fewer buttons.
- Step 1:
Pick a start from Start from: 1 stream, 2 side by side, 2×2, 1 big + 3, or 1 big + strip.
- Step 2:
Use Add tile and Remove tile, drag tiles to move them and drag their edges to resize.
- Step 3:
Type a name for the layout in the toolbar.
- Step 4:
Click Save & use. The template is saved and your desk switches to it.
Full editor (all controls)
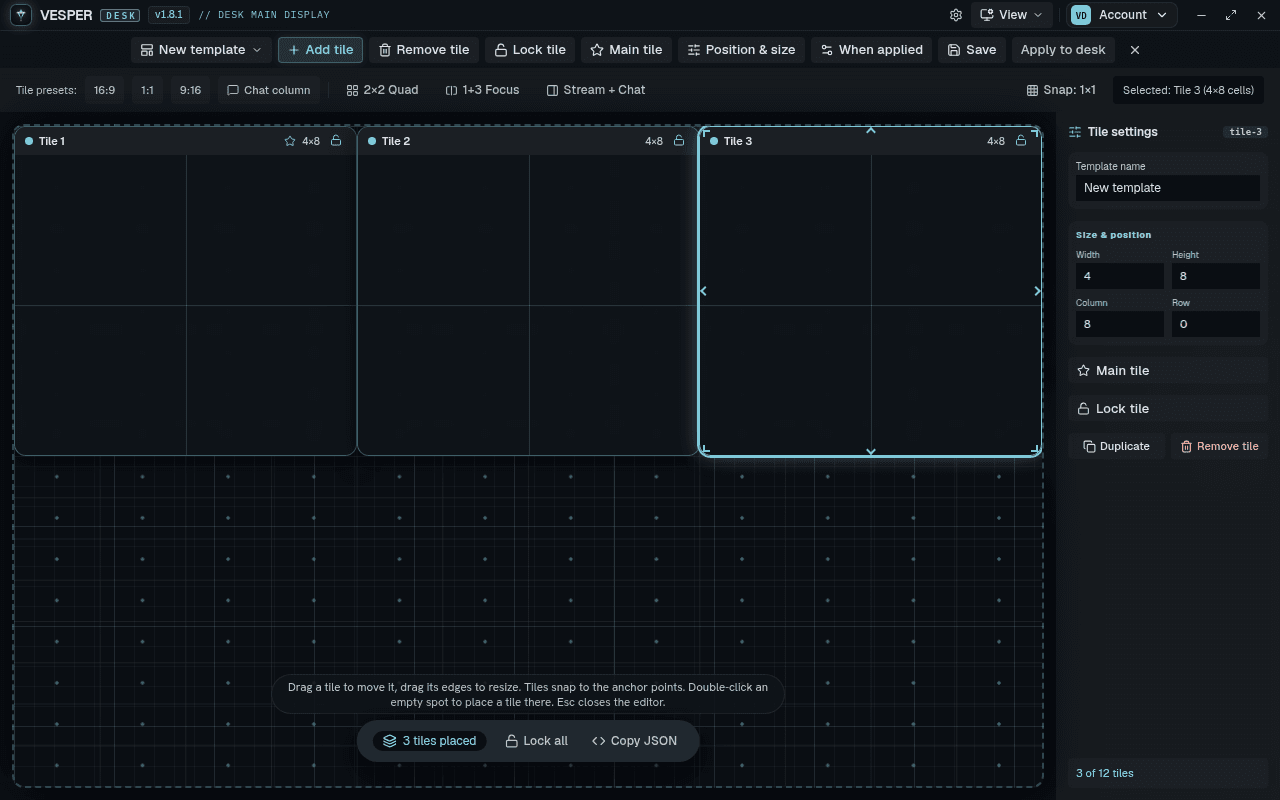
With Show all controls on, the editor adds finer tools.
- Step 1:
Press N or Add tile to add a tile, Delete to remove the selected one and Ctrl+D to duplicate it.
- Step 2:
Use Tile settings to set the template name and the selected tile's size and position in grid cells, or lock a tile so it cannot move.
- Step 3:
Set Main tile, Position & size and When applied (gap, chat side, opening mode and the main tile's sound).
- Step 4:
Click Save, then Apply to desk when you want to use it.
Templates are shapes only: they never store channels, accounts or sign-ins. Free plans keep up to 3 templates.