On this page
All guides
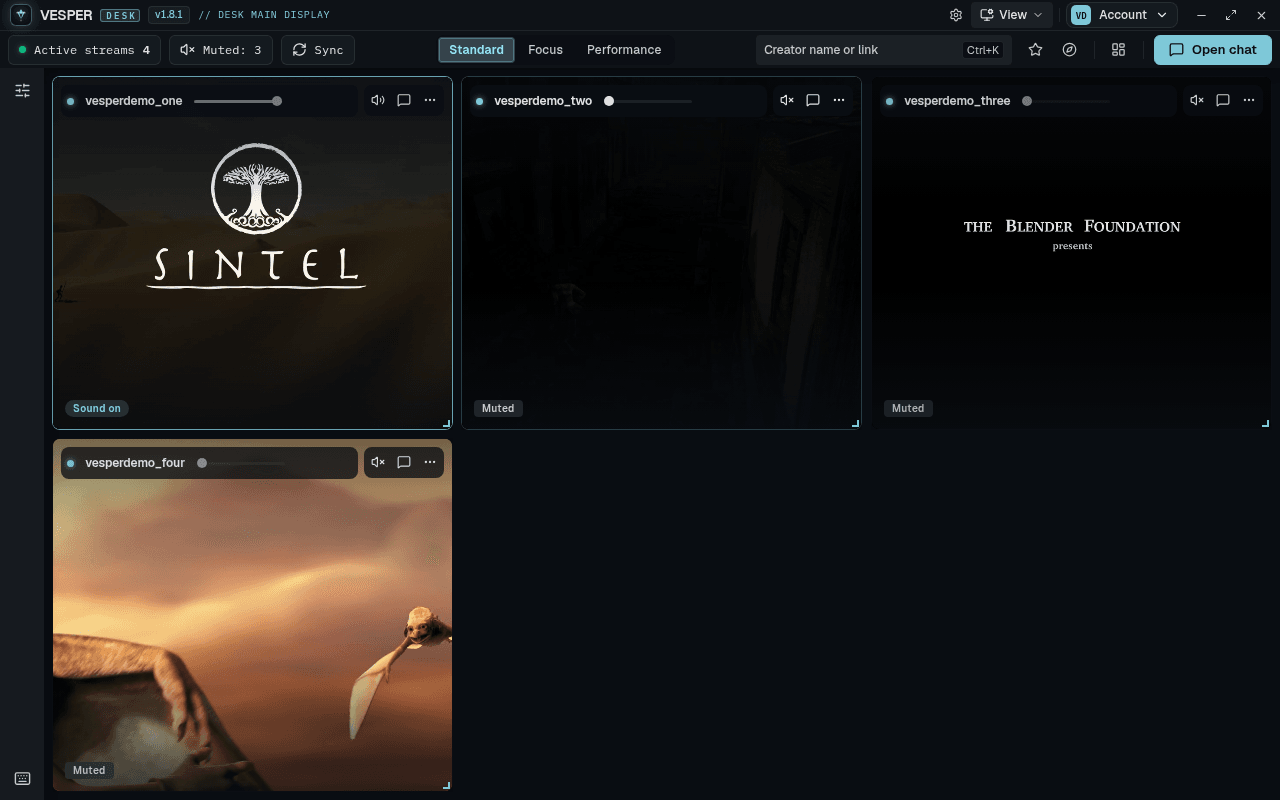
Add a stream
- Step 1:
Click the Creator name or link field in the toolbar, or press Ctrl+K.
- Step 2:
Type a name or paste a Twitch, Kick or YouTube link and press Enter.
- Step 3:
The new tile takes the first free spot on the desk. It starts muted so it does not talk over the stream you are already listening to.
Move and resize tiles
- Step 1:
Drag a tile by its title strip (the bar with the channel name) to move it.
- Step 2:
Drag the bottom-right corner of a tile to resize it. Tiles snap to the 12-column grid and never overlap.
- Step 3:
Click the channel name to focus that stream.
Tiles keep the size and place you give them. Nothing gets pushed around unless you turn on Auto-resize tiles.
Let the desk pack itself
- Step 1:
Open Settings → Appearance.
- Step 2:
Turn on Auto-resize tiles and press Save.
- Step 3:
Now adding a stream re-packs every tile into an even grid. Turn it off to go back to placing tiles yourself.
Tile controls and Pin tile
Every tile has Sound, Open chat and More. The badge on each tile says Sound on or Muted, and several tiles can play sound at once.
- Step 1:
Click More on a tile.
- Step 2:
Choose Pin tile to keep it where it is (Pro controls; see Appearance and toolbar).
- Step 3:
More also has Star save, Pop out chat, Pop out stream, Open on Twitch and Remove.